
Guide to installing the Divi on WordPress
Installing a theme is the most important step in building a WordPress site. The Themes give your website structure and function, and our favorite Theam is Elegant themes by Divi. it’s a powerful page builder for making WordPress websites. and If this is your first time installing a WordPress, here you will go through these steps and install Divi on your website within a few minutes. but do not forget to buy hosting and domain before starting the step.
Once you purchased a domain, hosting and installed WordPress, then you will be able to install the Divi theme package on your site.
Ok, have a look step by step guide below on how you can exactly install DIVI.
How to install DIVI?
Step 1 – The very first step to installing DIVI on your WordPress Site you have to visit https://www.elegantthemes.com/. and download Divi Theam. and it’s very powerful for everyone who has 0 knowledge about coding can create a beautiful website or any modification simply by drag and drop.
Step 2 – Do not forget to enable the auto-updates for the DIVI theme.
for auto-update, you must insert the Username & API key which you will get from your Divi account. after installation of DIVI to your WordPress site, head over to DIVI >click Theme Options >click Updates.
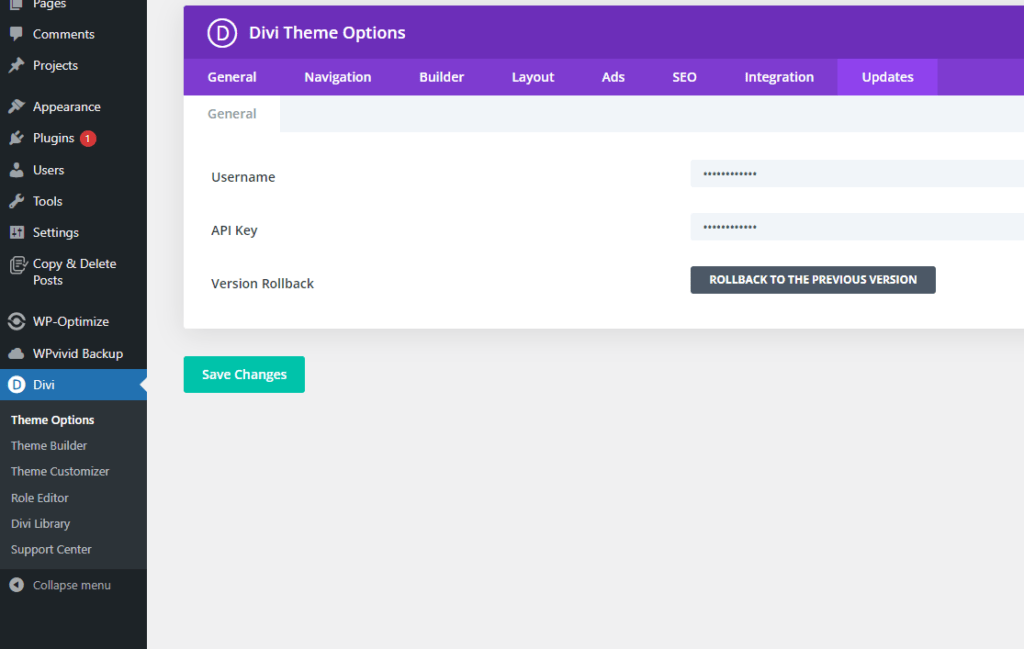
after clicking update you will see two boxes. One with Username and another with API Key. insert the Username & API Key which you will get from your Divi Elegant Themes Account. You can see the option « Version Rollback » this option will take you to the previous version if in case something error is found when updating the new version of Divi.
Step 3 – The third step to set up your preferred colours Divi is Setting you can choose your colours so that you do not come back, again and again, to choose your colour when doing the project.
You can easily do this by heading back to step 2 but instead of clicking the Update button, go the General instead.
you can find the colour palette from here.
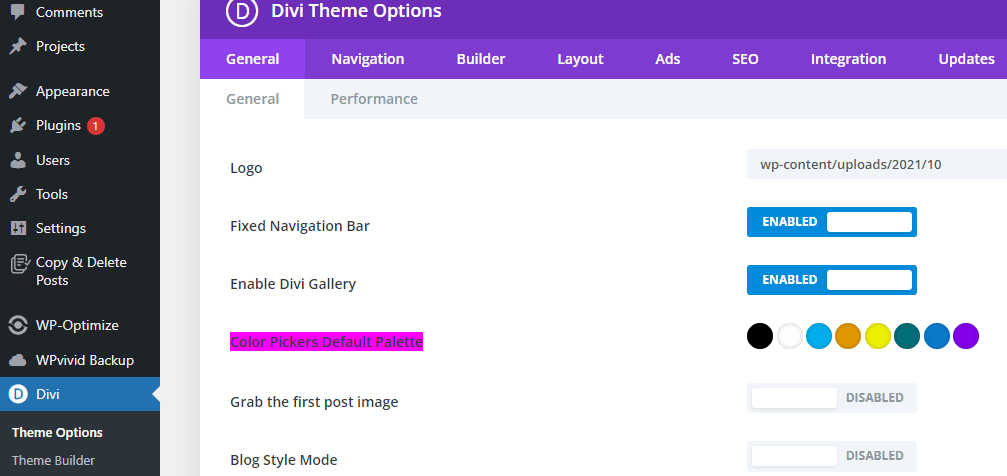
After choosing your own colour palette do not forget to hit the save button which is given very end of the theme options page. and that’s it now go to step 4 to create the web page ;
Step 4.
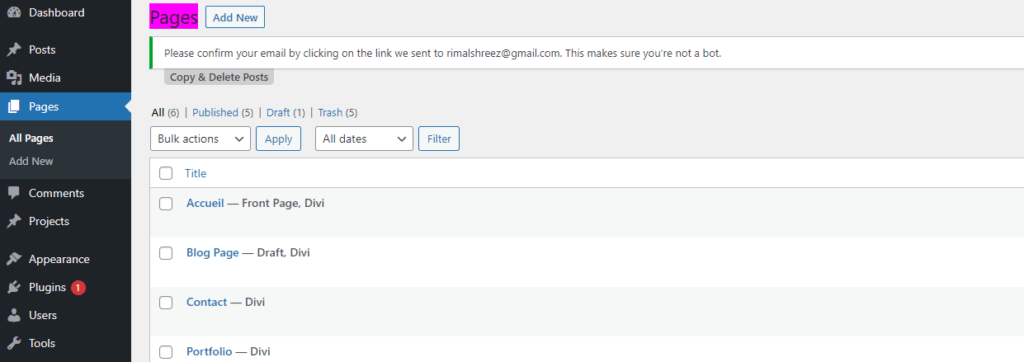
Head over the sidebar and find « page » click on it >add new < give a title of the page.
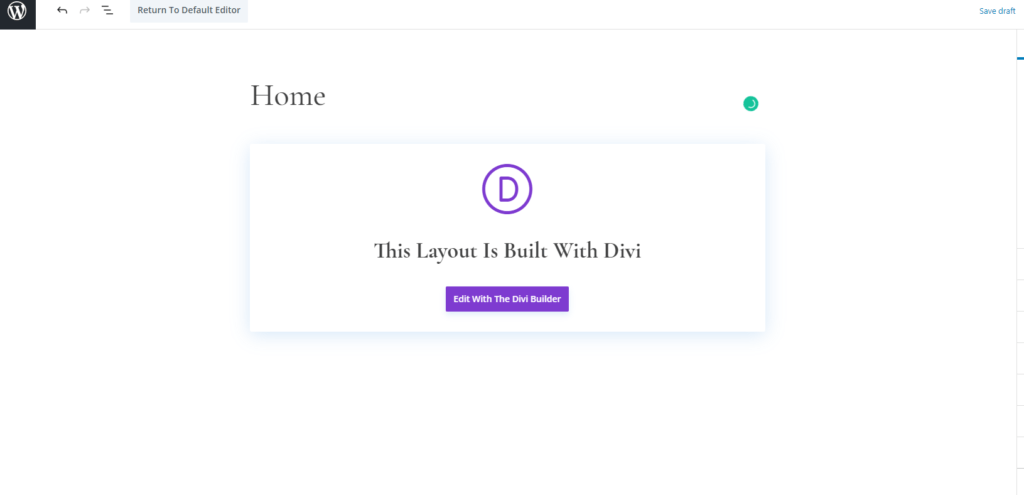
After giving the page title click click on edit with Divi builder then you choose as your wish how you can create the page if you want from scratch click on « Build from scratch » and if you want to use premade theme simply click on the « choose a premade layout » option. the option « Colon existing page » option you can use later when you have already create some pages.

Now you are going to create the page from scratch so simply click on the first option then choose a row of what types of you would like to create. the row will be creat automatically inside the section.

choose the Module. you can choose different types of modules according to your needs in your webpage such as « text » » Image » Button, contact form, etc…see the screenshot below …

Step 6.
After inserting Module and content on it now you can design the page easily . just hover the mouse above the row or module and you will see a gear icon click on it then you will see the screenshot which is given below. click on design and then you will find different options such as sizing, spacing, font style animation etc.

Divi is Really very easy and powerful if you play 1 day with Divi you can create a beautiful website within a few hours.
We hope that this short guide you find helpful and informative. if you have any problem do not hesitate to write to us we will try to respond as soon as possible.